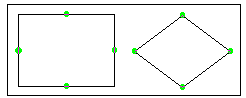
Attachment points
Home > Shapes and Lines Procedures > Connector Lines and Line Routing
Connector Lines and Line Routing
When you connect two shapes, iGrafx automatically routes the connector line between them. When grid snapping is turned on, lines connecting to shapes snap to grid locations. Pre-set attachment points have a stronger pull than the grid. If you place a line near one of these attachment points, it snaps to it. To override this pull, press the Ctrl key when you are connecting.
|
Attachment points |
Graphics cannot be connected to or from objects with a connector line, but they can be attached to connector lines. See Attach Graphics to Lines.
For information on shapes and graphics, see Graphics and Callout Lines.
|
Task |
Procedure |
|---|---|
|
Use this procedure with the Direct Connector or Right-Angle Connector line.
To restore the line to an automatically routed line, right-click the line and choose Route Line. |
|
|
Related Topics