Task
Procedure
View digital signature certificates
-
In an Internet Explorer window, on the Tools menu, choose Internet Options.
-
Click the Content tab.
-
Click the Certificates button to view certificates stores in the Certificates dialog box.
Import a certificate with private keys into the system
Double-click on a *.pfx file to start the Windows Certificate Import Wizard.
Customize digital signatures
Note: This procedure is typically performed by your Administrator.
-
In the Repository window, select the repository.
-
On the Repositories menu, point to Repository and choose Properties.
-
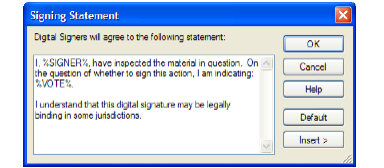
In the Repository Properties dialog box, select the Require Digital Signatures When Reviewing/Approving/Endorsing check box and click the Signing Statement button to view or customize the signing statement. On the digital signature, the text %SIGNER% is replaced by the name on the signing certificate and %VOTE% is replaced by the voting choice Yes or No.
-
Click the Insert button to insert one of these special values into the text, or click the Default button to replace the text with the original signing statement.
Digitally sign votes
-
Follow the "Review, approve, or endorse an item" procedure in Cycle Management for Users and Groups with Actions Required.
-
In the Review/Vote on Approval/Endorse dialog box, select the Digitally Sign This Vote check box.
-
Click the Choose button, select a certificate you want to use for your signature, and click OK.
-
In the Review/Vote on Approval/Endorse dialog box, click OK.
-
In the Digitally Sign dialog box, select the I understand and agree to the above check box, enter your Windows password (if required), and then click the Sign button.
If your administrator requires that every vote is signed, the check box is selected and disabled.
You can click the View button to see the details of the certificate.
The certificate you choose is the default choice the next time you digitally sign an item in the repository.

Verify signatures
-
On the Repositories menu, point to Cycles and choose Manage.
-
In the Manage Cycles dialog box, click the Log button.
-
Select the entry with the certificate icon next to the voter’s name and click the Signature button to see the name of the voter as it appears on the signing certificate and verify the signature.
Verify signatures for an item with a completed cycle
-
In the Repository window, select the document.
-
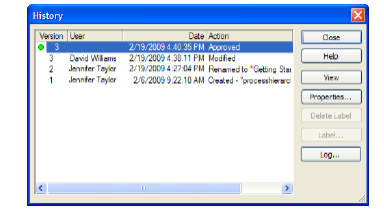
On the Repositories menu, point to Item and choose History.
-
Select the approval record, indicated by a green flag, and click the Log button.
-
Select the digitally signed item, indicated in the Log dialog box by a certificate icon, and click the Signature button to see the name of the voter as it appears on the signing certificate and verify the signature.